
As temperatures start to drop, your home quietly shifts into a different kind of workload, and the systems that kept things comfortable all summer now face new demands. A small leak, a weak seal, or an aging unit that seemed fine in October can turn into a costly emergency in January. Catching these warning signs early not only saves money but also protects your family from being caught off guard by a mid-winter breakdown. This guide walks through the most important areas of your home to inspect before the cold weather settles in for good.
- Inspect Your Roof for Hidden Damage
- Check Gutters and Downspouts for Proper Drainage
- Test Your Heating System Before the Cold Arrives
- Schedule a Cooling System Tune-Up While You Still Can
- Look for Warning Signs in Your Siding and Exterior Walls
- Prepare Your Lawn and Landscaping for Dormancy
- Evaluate Your Windows for Drafts and Heat Loss
- Confirm Your Roofing Materials Can Handle Snow Load
- Test Your Water Softener and Plumbing Before Freezing Temperatures
Inspect Your Roof for Hidden Damage
Your roof takes a beating throughout the year from sun, wind, and storms, and any weaknesses will only get worse once snow and ice start piling up. Small issues like curling shingles or exposed nail heads may seem minor now but can lead to leaks once moisture finds its way underneath. Walking the perimeter of your house and looking up with binoculars can reveal a surprising amount of damage you might otherwise miss from the ground.
If you notice sagging areas, missing shingles, or granules collecting in your gutters, it is worth scheduling an inspection with a residential roofer before winter storms arrive. A professional can spot flashing issues around chimneys and vents that are easy to overlook but often cause the worst indoor water damage. Getting ahead of these problems now means avoiding an emergency repair call during the first big snowfall.
- Look for curling, cracked, or missing shingles
- Check flashing around chimneys, skylights, and vent pipes
- Watch for granules accumulating in gutters or downspouts
- Note any sagging spots along the roofline
- Check the attic for daylight coming through the roof deck
Check Gutters and Downspouts for Proper Drainage
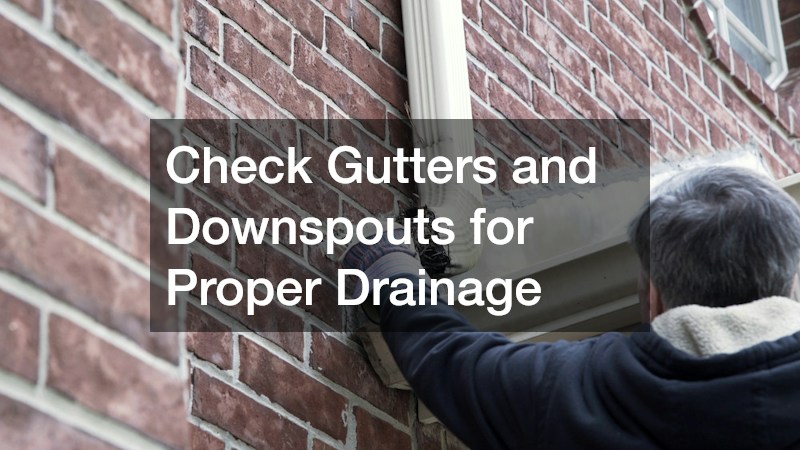
Clogged or damaged gutters cannot do their job when it matters most, and winter is exactly when you need water directed away from your foundation and roofline. Leaves, twigs, and debris trap moisture against the fascia board, which can lead to rot and ice dams once freezing temperatures set in. Taking the time to clear and inspect your gutter system now prevents a much bigger repair bill later.
Homeowners who have dealt with sagging, leaking, or rusted gutters often decide it is time to upgrade rather than keep patching old sections. Seamless gutters have become a popular option because they reduce the number of joints where leaks typically start, offering better long-term performance through harsh weather. A reputable seamless gutter company can measure your home and install a custom-fit system that handles heavy rain and melting snow without the seams that cause traditional gutters to fail.
- Remove leaves and debris before the first freeze
- Check for sagging sections or pulling away from the fascia
- Look for rust spots, cracks, or separated joints
- Confirm downspouts direct water at least five feet from the foundation
Test Your Heating System Before the Cold Arrives

There is nothing worse than discovering your furnace does not work on the first truly cold night of the year. Running your heating air conditioning system for a test cycle in early fall, before temperatures dip below 60 degrees, gives you time to catch strange noises, weak airflow, or inconsistent temperatures before you actually depend on it. Set the thermostat a few degrees above room temperature and let the system run for a full 15-minute cycle while you listen and check vents throughout the house. Pay attention to specific warning signs during this test. Banging or rattling noises often point to loose ductwork or a failing blower motor, while a burning smell that lingers past the first few minutes could indicate dust buildup or a more serious electrical issue. Weak airflow at the vents farthest from the furnace may mean your ductwork needs cleaning or your filter is overdue for replacement. A furnace that struggles to reach the thermostat setting or cycles on and off frequently is often signaling a problem that will only worsen with heavier use. This short-cycling behavior can stem from a clogged filter, a malfunctioning thermostat, or an oversized unit that heats too quickly and shuts off before properly circulating air. Left unaddressed, these issues tend to escalate into complete system failures right when you need reliable heat the most, so scheduling a professional inspection now can save both money and discomfort later.
Before you turn the thermostat down for the season, run your furnace or heat pump for a full cycle on a mild day to make sure it kicks on promptly, runs quietly, and actually produces warm air. Strange noises like banging, screeching, or rattling often signal a loose belt, worn motor bearing, or cracked heat exchanger, all of which are easier and cheaper to fix in October than in January. Replacing the air filter, checking the pilot light or ignition system, and clearing debris from around outdoor units are simple steps most homeowners can handle themselves. A dirty filter alone can cut efficiency by 5 to 15 percent and force the system to work harder than it should, so plan to swap it every one to three months during heavy use. While you’re at it, check that vents and returns throughout the house aren’t blocked by furniture or rugs, since restricted airflow can trigger short cycling or uneven heating from room to room. If your system is more than ten to fifteen years old, it may be worth having a technician evaluate whether repairs still make sense or if replacement would save money on energy bills. Rising repair costs, frequent breakdowns, or a noticeable jump in your heating bills compared to previous winters are all signs that a newer, more efficient unit could pay for itself over time. A professional tune-up, typically costing $75 to $200, can also catch issues like a cracked heat exchanger or carbon monoxide leak that aren’t obvious from casual observation. Waiting until the coldest week of the year to address heating problems almost always costs more, both in comfort and in emergency service fees. Emergency after-hours calls during a cold snap can run two to three times the price of a routine fall appointment, and parts availability tends to shrink when every HVAC company in town is swamped with the same requests.
- Replace or clean the furnace filter monthly during heavy use; a clogged filter forces the system to work harder and can spike energy bills by 5-15%
- Run the furnace for 10-15 minutes and listen for banging, rattling, or squealing sounds on startup, which often signal loose belts, worn bearings, or ignition issues
- Check that vents and returns are unobstructed by furniture, rugs, or curtains to keep airflow balanced across every room
- Test the thermostat for accurate temperature readings by comparing it to a separate room thermometer, and replace batteries if it’s battery-powered
- Schedule a professional tune-up before the first freeze to catch issues like cracked heat exchangers or carbon monoxide leaks early
- Inspect the area around the furnace for dust buildup, water stains, or a yellow (rather than blue) pilot light flame
Schedule a Cooling System Tune-Up While You Still Can
It might seem strange to think about air conditioning as winter approaches, but fall is actually the ideal time to schedule maintenance because service schedules are lighter and appointments are easier to book. Many AC companies offer discounted tune-ups during the off-season, which can extend the life of your unit and catch small issues before they become expensive repairs. A quick inspection now means your system will be ready to go without delay when warm weather returns.
Skipping this step often means discovering a refrigerant leak or worn belt on the first hot day of spring, when service calls are backed up for weeks. Having a professional clean the coils, check refrigerant levels, and inspect electrical connections during the off-season protects your investment and keeps energy costs manageable. Think of it as a maintenance appointment that pays for itself through fewer breakdowns and better efficiency down the road.
- Book service appointments early in fall for shorter wait times
- Ask about coil cleaning and refrigerant level checks
- Cover outdoor units loosely to protect from debris, not moisture
- Keep the area around the unit clear of leaves and plant growth
Look for Warning Signs in Your Siding and Exterior Walls

Your home’s exterior siding does more than affect curb appeal; it acts as a barrier against wind, moisture, and temperature swings all winter long. Cracked, warped, or loose panels allow cold air to seep in and moisture to collect behind the surface, which can lead to mold or structural damage over time. Walking around your home and pressing gently on suspicious areas can help you identify soft spots that need attention.
If you find widespread damage or notice your energy bills climbing each winter, it may be time to consult a best siding installer about repair or replacement options. A qualified installer can also recommend materials with better insulation properties, which pays off in both comfort and lower heating costs. Addressing siding issues before winter prevents small cracks from turning into bigger structural repairs once ice and snow settle in.
- Check for cracked, warped, or loose siding panels
- Look for soft spots that may indicate water damage underneath
- Inspect caulking around windows and doors for gaps
- Watch for peeling paint or discoloration, which can signal moisture issues
Prepare Your Lawn and Landscaping for Dormancy
While it is easy to focus only on the systems inside your walls, your yard also needs preparation before winter dormancy sets in. Bare or thin patches of lawn are especially vulnerable to erosion once snow melts and spring rains arrive, so addressing them in fall gives grass time to establish roots before the ground freezes. This is also a good time to clear dead plant material that could attract pests or trap moisture against your foundation.
For larger bare areas or new landscaping projects, many homeowners turn to hydroseeding as an efficient way to establish grass before winter weather halts growth. This method combines seed, mulch, and fertilizer into a sprayable mixture that helps grass take root faster than traditional seeding, giving your lawn a head start before the cold arrives. Getting this done in early fall means your yard will bounce back green and full once spring temperatures return.
- Address bare patches before the ground freezes
- Clear fallen leaves and debris from garden beds
- Trim back plants near the foundation to prevent moisture buildup
- Consider aerating soil to improve drainage before winter rains
Evaluate Your Windows for Drafts and Heat Loss

Windows are one of the biggest sources of heat loss in most homes, and even small gaps around the frame can significantly increase your heating costs. Holding a lit candle or a piece of tissue near the edges of your window frames on a windy day can help you spot drafts you might not otherwise notice. Weatherstripping and caulk are inexpensive fixes for minor leaks, but larger gaps may indicate it is time to consider new window installations altogether.
Beyond sealing gaps, adding window shades can make a noticeable difference in how much heat your home retains during cold months. Insulated cellular shades in particular trap a layer of air between the glass and the room, reducing heat loss significantly compared to bare windows. Closing them at night and opening them during sunny afternoons is a simple habit that helps regulate indoor temperatures without touching the thermostat.
- Check for drafts along frames, sashes, and where glass meets frame
- Apply weatherstripping or caulk to seal small gaps
- Consider insulated or cellular shades for better heat retention
- Open shades during sunny days to capture natural warmth
Confirm Your Roofing Materials Can Handle Snow Load
Not all roofing materials perform the same way under heavy snow and ice, and understanding what your roof can handle is important before the first major storm hits. Older roofs, or those with a history of leaks, may need reinforcement or repair to safely support accumulated snow weight throughout the season. This is especially true for homes in regions that regularly see significant snowfall or rapid freeze-thaw cycles.
Consulting with experienced roofing contractors before winter allows you to address structural concerns while weather conditions still permit safe work on the roof. They can also advise on preventive measures like ice and water shield installation in vulnerable areas, which helps protect against ice dam formation. Taking this step now avoids the danger and expense of emergency repairs once snow and ice make the roof difficult and risky to access.
- Ask about snow load ratings for your specific roofing material
- Consider ice and water shield in valleys and eaves
- Check attic insulation and ventilation to reduce ice dam risk
- Address any structural sagging before winter storms arrive
Test Your Water Softener and Plumbing Before Freezing Temperatures
Cold weather puts extra strain on plumbing systems, and a water softener that is not functioning properly can lead to mineral buildup that worsens existing pipe issues. Signs of trouble include reduced water pressure, spotty dishes, or a noticeable change in how soap lathers throughout your home. Catching these symptoms early gives you time to address the root cause before pipes are also dealing with freezing temperatures.
If your system has been acting up, scheduling water softener repair before winter ensures it continues protecting your pipes and appliances from scale buildup during the season when plumbing problems are hardest to fix. Technicians can also check your water heater and exposed pipes for insulation needs while they are already addressing softener issues. Combining these checks into one appointment saves time and reduces the chance of a frozen pipe emergency later in the season.
- Watch for reduced water pressure or spotty dishes and glassware
- Check salt levels and refill the brine tank as needed
- Insulate exposed pipes in unheated areas like garages and crawl spaces
- Schedule a water heater inspection alongside softener maintenance
Preparing your home for winter does not have to mean tackling everything at once, but working through this checklist before the cold weather settles in will save you time, money, and stress in the months ahead. Start with the systems that show the clearest warning signs, whether that is a drafty window, a sluggish furnace, or gutters that struggled during the last heavy rain. Addressing these issues now, while contractors have availability and weather still allows for repairs, puts you in a much stronger position when winter finally arrives. Taking action today means you can spend the season enjoying your home instead of reacting to emergencies.